The latest addition to CrowdSec was OPNsense, a FreeBSD distribution designed for security. OPNsense is easy to set up and offers a firewall and routing software to secure a network. It can be compared to pfSense from which it is derived. It is therefore widely used by companies.
This tutorial covers how to install the CrowdSec plugin on OPNsense. This is an English version of the article published on February 24th by Korben.
Still under development, this open-source port allows you to set up rules at the OPNsense firewall level, relying on CrowdSec’s shared blocking lists. Beyond the OPNsense interface, which will allow you to set up the firewall rules, you will also be able to exploit CrowdSec to the maximum of its capabilities by using the command line agent, and set up your specific bouncers, or manage the list of rules in place.
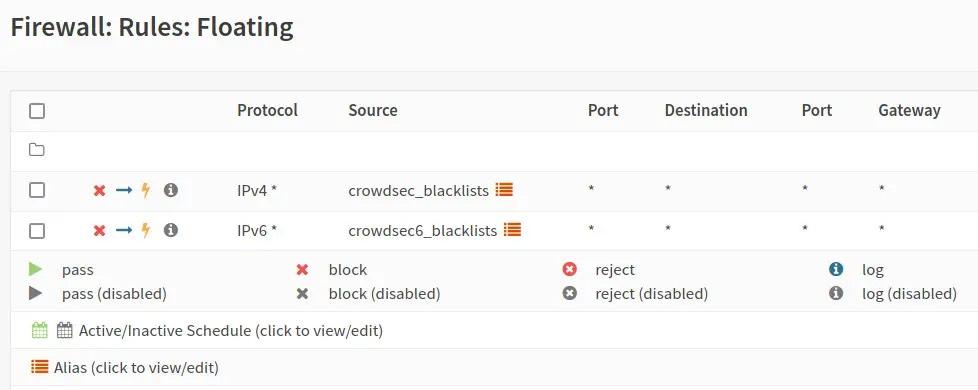
OPNsense Rule List
In this tutorial, you will see how to enable SSH login on OPNsense because you need that to install CrowdSec (since it’s not yet available via official channels) and to manage it using cscli. Managing in this context means installing and updating collections, parsers, and other administrative tasks.
To install the CrowdSec plugin on OPNsense, you need to enable the SSH server on OPNsense. But first, we need to create an SSH key. To do this, open a local terminal on your machine and enter the following command:
ssh-keygen -t rsa
Answer the questions and you will have a set of public/private SSH keys. Now you have to send the public key to OPNsense to authorize the connection.
Display your key with the cat command:
cat id_rsa.pub
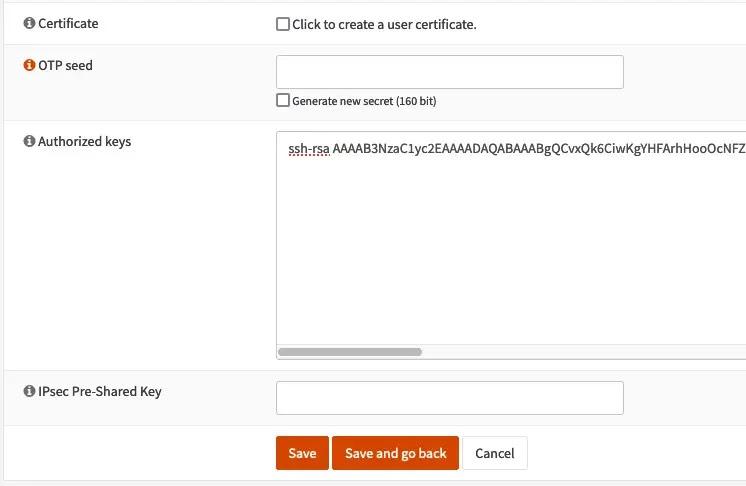
Then in OPNsense, go to System > Access > Users. Then edit the user you want to associate the key with. In that case, we added a user “korben” in the admin group. Don’t forget to configure a shell for it too (/bin/sh for example).
Then in the “Authorized keys” field, paste the public key:
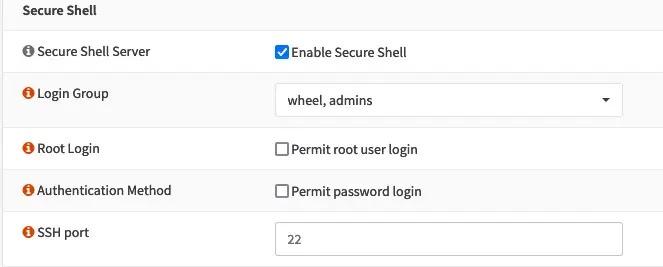
Next, we will enable SSH. To do this, go to the System > Settings > OPNsense Administration menu and under the “Secure Shell” section, check “Enable Secure Shell”.
And that’s it. Now we can SSH access our OPNsense server using the SSH key:
ssh -i NOMCLEPRIVEE korben@192.168.xxx.xxx
Then, you have to download the CrowdSec plugin and unzip it. You will then have 3 files in .txz. You can then transfer them to OPNsense with the SCP command like this:
scp -i opnsense opnsense_22.1-freebsd_13-oscrowdsec_0.0.5/* korben@192.168.xxx.xxx:~/
To install the packages on OPNsense, you must be root.
su –
Then you have to do it in this order:
pkg add ./crowdsec-1.3.0.txz
pkg add ./crowdsec-firewall-bouncer-0.0.22_2.txz
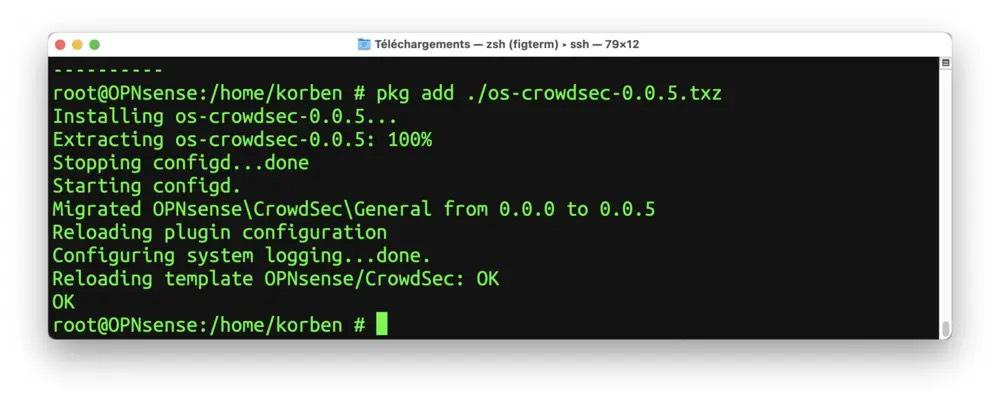
pkg add ./os-crowdsec-0.0.5.txz
The plugin will then be available in the OPNsense admin interface. It is up to you to activate the agent and the Firewall bouncer if you plan to use it.
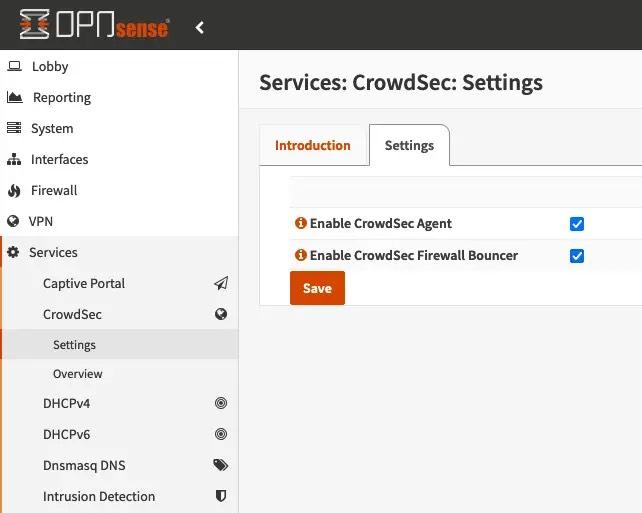
Once the last plug-in is downloaded and installed on OPNsense, you will only have to activate it through the OPNsense admin interface to link the 2 tools. Out-of-the-box protections include ssh and HTTP brute force attacks on the admin interface. Please read the technical documentation on this subject. And support is available through the GitHub issues or the #bsd channel on Discord.
A typical multi-server scenario where OPNsense acts as the fronted to multiple machines, each with its own CrowdSec agent, is covered by the article on how to set up a CrowdSec multi-server installation and referenced in the documentation.
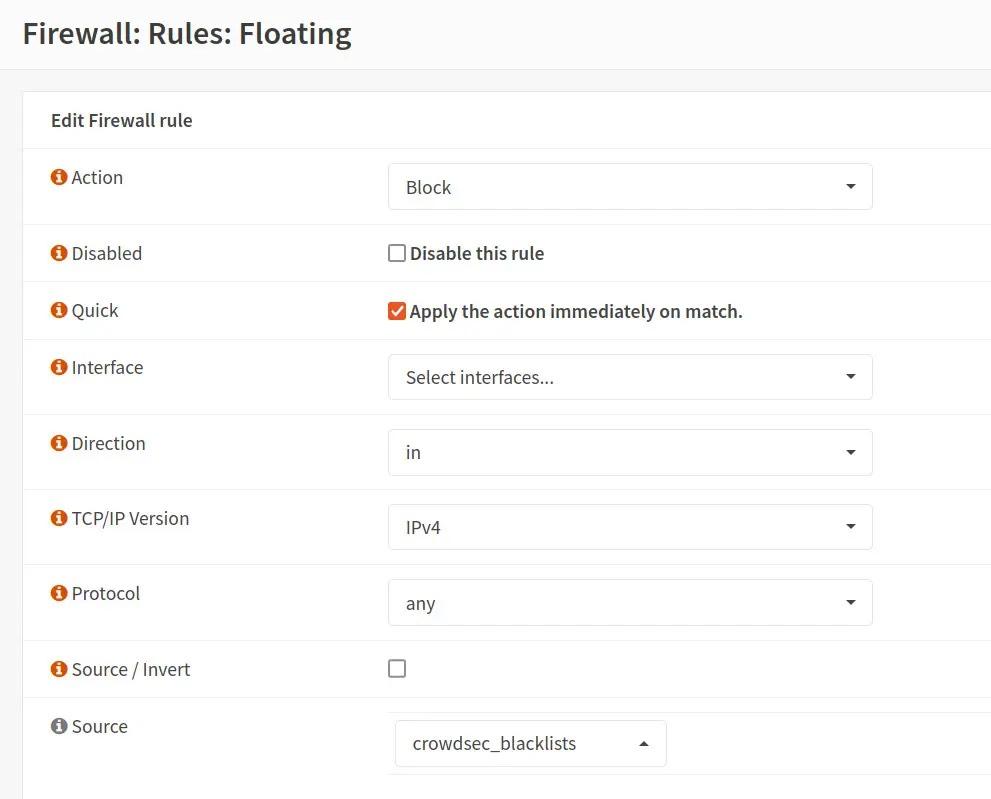
Editing a blocking rule using CrowdSec lists
Done! This is how you can use CrowdSec on your OPNsense machine. If you have any questions, feel free to jump to CrowdSec’s Discord server or GitHub for support.