This article is a direct translation of Florian Burnel’s article published on IT Connect. You can find the original article here.
We also have an article on installing CrowdSec on a Windows server with a tutorial on blocking brute force attacks on an RDP connection and blocking a scan of a website hosted on an IIS server.
I. Presentation
In this tutorial, we will dive into how to secure a Microsoft Exchange mail server with the CrowdSec collaborative firewall! Installing CrowdSec on a Microsoft Exchange server will allow you to protect against common attacks but also new threats.
A good example is the security breach ProxyNotShell which made headlines in October 2022: CrowdSec can detect exploit attempts and block malicious IP addresses, thanks to the fact that it contains a collection for IIS and attacks based on HTTP/HTTPS protocols. Other examples are more classic cases: brute force attacks on the Exchange webmail interface.
Due to how it functions, an Exchange server will be exposed to the Internet depending on the architecture of your IS (for example, the presence or absence of a reverse proxy). However, it must be able to communicate outward and also be reachable from the outside to send and receive emails to your users’ mailboxes.
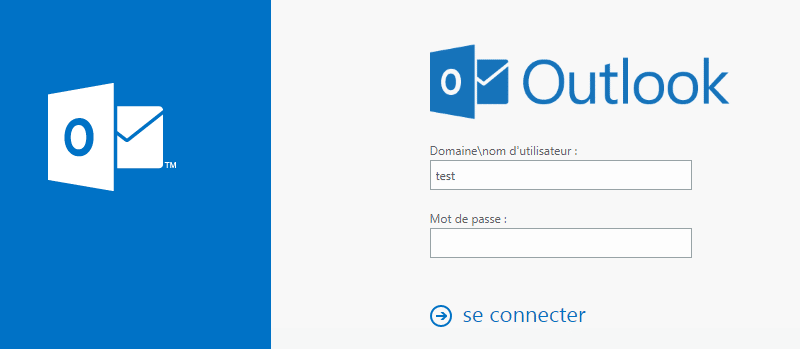
This same server is also reachable through Webmail which allows users to check their emails from a browser. This implies the presence of an IIS web server that hosts both Webmail and Exchange Admin Center. Furthermore, when an Exchange server is compromised by a cyberattack, this mainly involves HTTP/HTTPS access: hence the interest in protecting yourself.
This article is a continuation of my first article on installing an Exchange Server 2019 server. For the installation of the Microsoft Exchange Server itself, I invite you to read my previous tutorial.
In addition, I also encourage you to restrict access to the Exchange admin center.
II. Setting up CrowdSec on Windows
A. Installing the CrowdSec Agent
I already wrote about how to install CrowdSec on Windows in a previous article, but that was the Alpha version. Now, the CrowdSec agent for Windows is available in a stable version, which means that it is ready to be implemented in production.
Note: if you have previously installed the alpha version on your server, you must uninstall it before installing this new CrowdSec version.
First, you must download the MSI package from the official CrowdSec GitHub repository.
While it is installing, the CrowdSec MSI package will perform the following actions:
- Install CrowdSec itself
- Integrate the Windows Collection (details are available here)
- Register the CrowdSec instance with the Central API
- Register the CrowdSec service within Windows (automatic start)
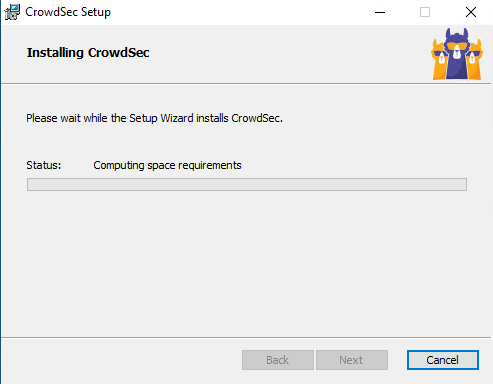
Once done, begin the installation. Just follow the steps without making any changes. Then, allow about 2 minutes for the Agent to fully install.
As soon as the CrowdSec Agent is in place, we have access to the “cscli” command line which allows you to manage your CrowdSec instance from it.
To list current collections:
cscli collections list
To list the current bouncers (none by default):
cscli bouncers list

B. Installing the ISS Collection
On Windows, CrowdSec natively sets up the “crowdsecurity/windows“, but it is not enough to protect your Exchange server. We will need to add the IIS collection, which will also add two more collections to detect web attacks.
This collection is installed from this command:
cscli collections install crowdsecurity/iis
In just a few seconds after adding, we can list the installed collections to see the presence of the new collections.

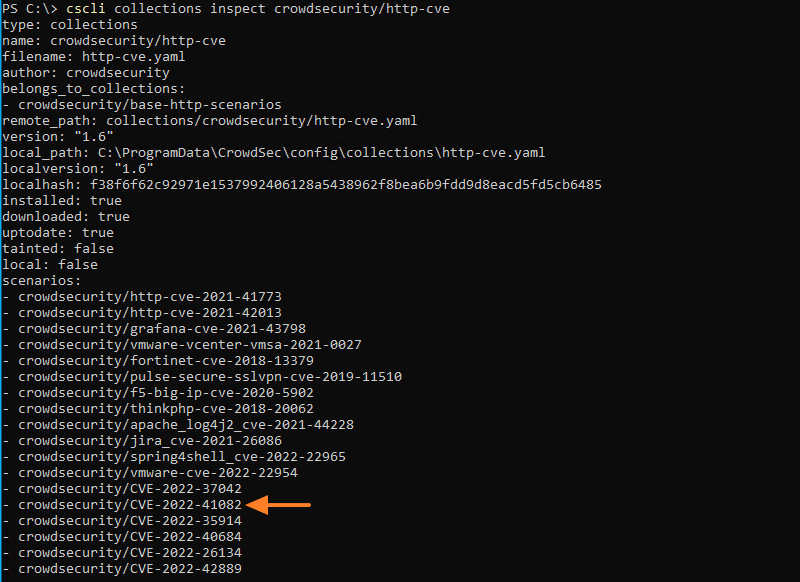
To justify what I said in the introduction about the ProxyNotShell vulnerability, we can look at the details of the “crowdsecurity/http-cve” collection. Here, we can see the presence of a detection scenario named “crowdsecurity/CVE-2022-41082” corresponding to this vulnerability.
cscli collections inspect crowdsecurity/http-cve
Let’s go to the next step.
C. Installing Windows Firewall Bouncer
Now, we must set up the “firewall” bouncer for Windows, otherwise, attacks will be detected, but not blocked. Click on the following link, then on the “Download” button to download the MSI package: https://hub.crowdsec.net/author/crowdsecurity/bouncers/cs-windows-firewall-bouncer
The installation is done in only a few clicks: just follow the wizard.
Once done, the command below will make it possible to see the presence of the bouncer.
cscli bouncers list

Let’s go to the next step.
D. Add IIS log support
For CrowdSec to focus on the logs generated by IIS, and by extension, corresponding to the access to the OWA and ECP portals of Exchange, we must indicate to it the paths to the log files it will analyze.
To do this, you will need to edit the following:
C:ProgramDataCrowdSecconfigacquis.yaml
In order to add the following lines:
---use_time_machine: true
filenames:
  - C:inetpublogsLogFiles**.log
labels:
  type: iis
You can see the presence of a “dynamic” path which is characterized by the presence of the wildcard character: “C:inetpublogsLogFiles**.log “. This value will allow CrowdSec to find and read log files located in the tree “C:inetpublogsLogFiles
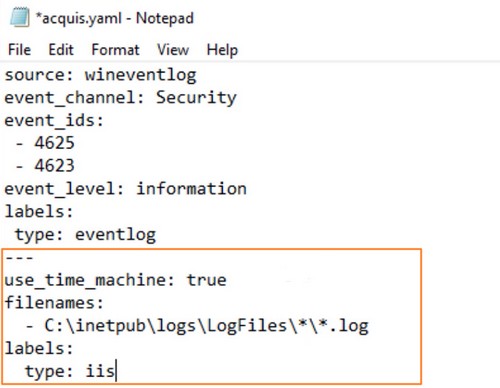
In addition to the path to the log files, this configuration block we just added contains a parameter named use_time_machine. It is important because IIS does not write logs in real-time in the log file, but it writes new events in blocks, every minute. Thanks to this parameter, CrowdSec will read the date and time of each line to find its way and process the events chronologically, this avoids false positives.
However, if you are not using the log files, but the event viewer, you should use this piece of code and not the one mentioned above:
---
source: wineventlog
event_channel: Microsoft-IIS-Logging/Logs
event_ids:  - 6200
event_level: information
labels:
type: iis
Save the acquired.yaml file and you can close it.
Finally, we need to restart CrowdSec. This operation is done in PowerShell with this command:
Restart-Service crowdsec
CrowdSec setup is complete! Now let’s test it!
III. Is the Exchange server protected?
A. Brute force on OWA – Webmail Exchange
There are several possible methods to perform a brute force attack on OWA. Of course, you could do this manually for testing, but you could also use something a bit more automated to simulate a brute-force attack. As for us, we will use a Bash script named “OWA BRUTE” that executes Hydra (an offensive tool compatible with many protocols to test a service’s authentication, equipment, etc. ) with specific parameters corresponding to Outlook Web Access.
The script is available on GitHub.
First, we need to install Hydra and Git. The first one is a prerequisite to use the script and perform our attack, while the second one will be used to clone the GitHub repository to get the Bash script (you can also copy and paste the script in a file…).
sudo apt-get update
sudo apt-get install hydra git
Once this is done, we clone the GitHub project in “/home/florian”:
cd /home/florian/
git clone
Then, we create a file “users.txt” in which we indicate some names of users. You can also recover a list on the Internet.
nano /home/florian/owabrute/users.txt

In the same sense, we create a file “passwords.txt” with the passwords to test.
nano /home/florian/owabrute/passwords.txt

Then, we move to the OWA BRUTE directory to add the execution rights on the Bash script.
cd /home/florian/owabrute/
chmod +x owabrute.sh
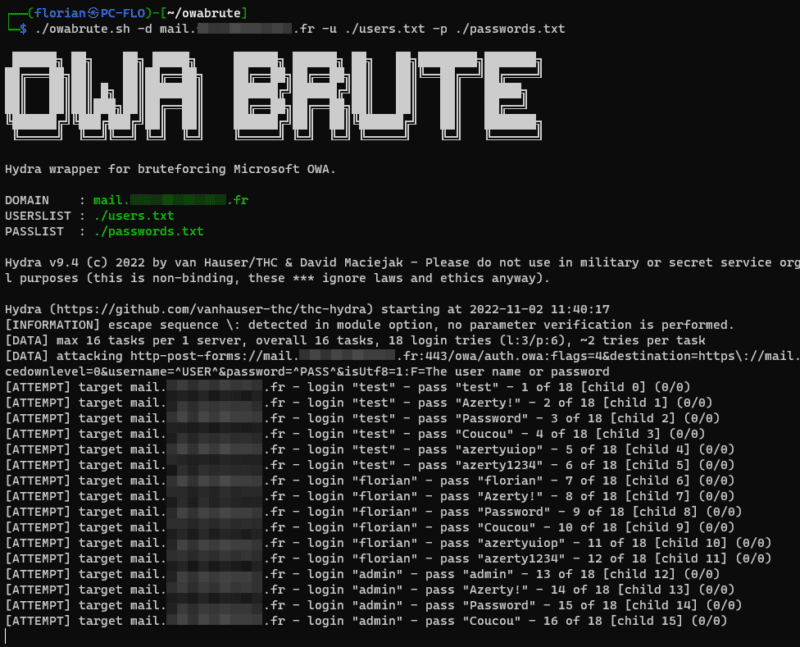
All that remains is to launch the attack by targeting “mail.domaine.fr” and then using our previously created files.
./owabrute.sh -d mail.domaine.fr -u ./users.txt -p ./passwords.txt
We can see that the script will test each combination. At the end, it will indicate if it has succeeded or not in finding a valid combination. However, CrowdSec will intervene…
Indeed, if I look at my Exchange server, I can see that there is a new IP address blocked because of brute force (“crowdsecurity/windows-bf”). The CrowdSec agent has correctly blocked the IP address that caused this attack.

Since we are here to test, we can unblock our IP address manually:
cscli decisions delete –ip X.X.X.X
Let’s move on to a second test.
B. Scan Web on OWA
In the case where someone tries to scan your Web server, when IIS is used by Exchange, they can rely on various tools including Nikto which is used to analyze the security level of a Web server. For this example, OWA will be scanned with the Nikto tool: we will see if CrowdSec detects what is happening on the IIS server…
First of all, let’s install this tool:
sudo apt-get update
sudo apt-get install nikto
Then, we launch the scan to webmail:
nikto -h https://mail.domaine.fr/owa
The analysis will take several minutes…
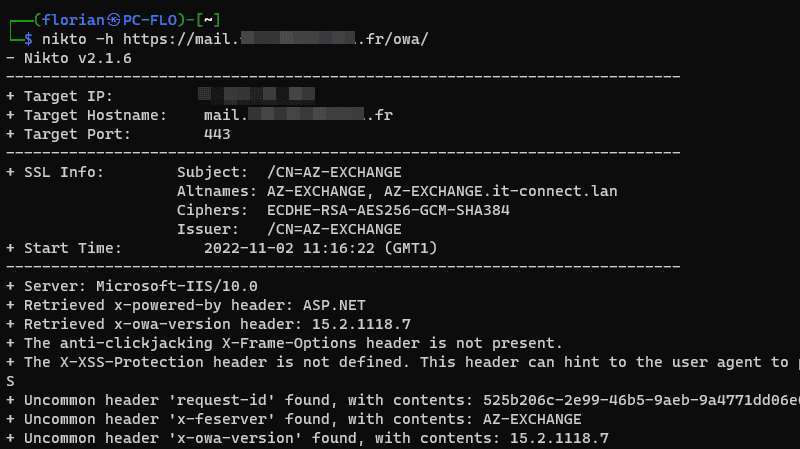
…Except that after a while, CrowdSec will realize that this web client is performing suspicious actions and it will decide to block it. In the example below, we can see the reason “http-sensitive-files” which means that the client tried to access sensitive files.

In this second example, where we performed a completely different action compared to the first attempt, CrowdSec also managed to detect our malicious actions.
IV. Conclusion
We have just seen how to set up the CrowdSec agent on Windows to protect a Microsoft Exchange mail server! Here, I took the example of Exchange Server 2019, but it also applies to previous versions. With these two quick, but concrete examples, we could see the efficiency of CrowdSec!
I’ll also take this moment to remind you of the existence of the CrowdSec Console which allows you to follow the alerts raised by one or more CrowdSec Agents from a web-based console. To learn more about the implementation and all the functionalities, you can visit the Console page.


