
In our accelerated world, security is more important than ever. Whether you are a multi-million dollar company or a small business serving local clients, you must protect your company’s employees and valuable data.
“The year 2021 was a busy year for cybersecurity experts and IT professionals as businesses worldwide faced a barrage of cyberattacks. In fact, the last year has been a record-breaking year for cyberattacks,” according to Spanning Cloud Apps. Cyberattacks are not just threats but could potentially cause revenue loss. This issue will become increasingly serious as working from home becomes a standard.
In this series, I will walk you through how to build, test, and present a much more affordable firewall and router combination for smaller businesses than existing solutions on the market. I will also propose future improvements to upgrade this complete package further and make it more user-friendly for non-technical persons. My thesis contains useful information for network professionals and security experts who plan to design complex, cost-effective, secure, but usable networks for smaller businesses.
The first part of this series only covers the hardware setup of my environment. If you’re not interested in this part, feel free to skip to the running configurations or attack scenario parts:
- Building a Network for Small Businesses Part 2: Running Configurations
- Building a Network for Small Businesses Part 3: Attack Scenarios
Lab environment
Developing such a complex device is not an easy job to do. It all starts with the hardware. After I had chosen an off-the-shelf computer for this build, I had to think about the internal structure of my home network. This required me to make modifications to my personal network to test all its features securely and privately. The lab environment came with some difficulties, and it added some complexity, but the advantages outweighed the disadvantages.
Hardware choice
First, I would like to explain my thought process when I chose this specific system. When I did my research, I wanted something considered old for everyday use but a complete package (like an office PC from a reputable vendor). I purposefully opted out of mini-PCs and HTPCs because they are generally hard to upgrade and hard to add PCIe devices, which were inevitable for this project.
Mid-tower office PCs seemed a good compromise between upgradeability and size while having decently modern hardware. Therefore, I bought a Dell MT PC (Figure 12.) second-hand for around 10.000 HUF.
Specification:
- Intel(R) Core(TM) i3-3220 CPU @ 3.30GHz
- 1 x 4GB DDR3 Synchronous 1600 MHz
- Seagate BarraCuda 250GB 8MB 7200rpm SATA3
- Cisco Broadcom 5709 N12075 4-Port 1GbE Ethernet PCI-e Network Adapter
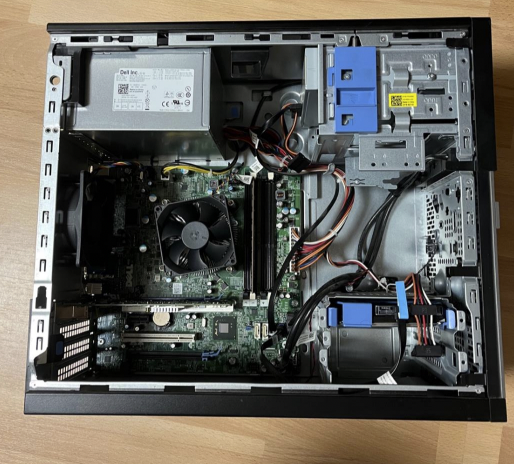
In my opinion, this computer is more than capable of handling gigabit traffic with line speed but leaving enough resources on the table for future expansion. Down the line, the bottleneck will probably be the CPU, as it has only two cores and four threads for processing packets. Regarding memory, 4GB of RAM should be plenty, mainly compared to MikroTik or Ubiquiti firewalls in this price range. Internal cold storage does not make a huge difference, because the OS only stores configuration and log files there. Despite having a four port ethernet card, I am only using one of the ports as software switching could be really taxing on the system. I am using the dedicated ethernet port for the WAN connection and the PCIe device for the internal LAN.
The chassis is a mid-tower design, which means it has room for future PCIe cards or upgrades. Furthermore, none of the components are soldered, so changing the CPU or adding more should not be an issue. This flexibility comes with one drawback: size. This PC’s footprint is significantly larger than that of a mini-PC or consumer router.
Network
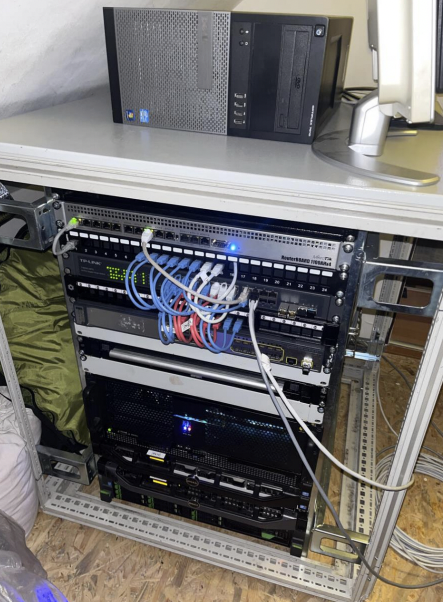
My entire home network is complex by default. I have completely redesigned our home network from the ground up. I installed CAT5e cables in every room and created a centralized location for all the rack-mounted networking equipment in the attic. I configured everything from the router, modem, VLANs, and APs and created different SSIDs for IoT devices. I also added multiple servers for self-hosting services like Plex, Bitwarden, Blue Iris, and Nextcloud to back up our most important files to the cloud using Backblaze B2. Furthermore, I added a load of IoT devices to the household to monitor and control many aspects of our home.
For this reason, I had to plan where I wanted to add the lab network. I added a network diagram for easier understanding (see below).
My network consists of 3 VLANs with different purposes:
- VLAN 1: Primary VLAN where all the trusted devices are, this VLAN can access all other VLANs and the internet — 192.168.1.0/24
- VLAN 2: IoT VLAN where all the IoT accessories are located, this VLAN can only access the internet — 192.168.2.0/24
- VLAN 69: Guest VLAN where all the guests’ smartphones and laptops can connect to, this VLAN can only access the internet and nothing else — 192.168.69.0/24
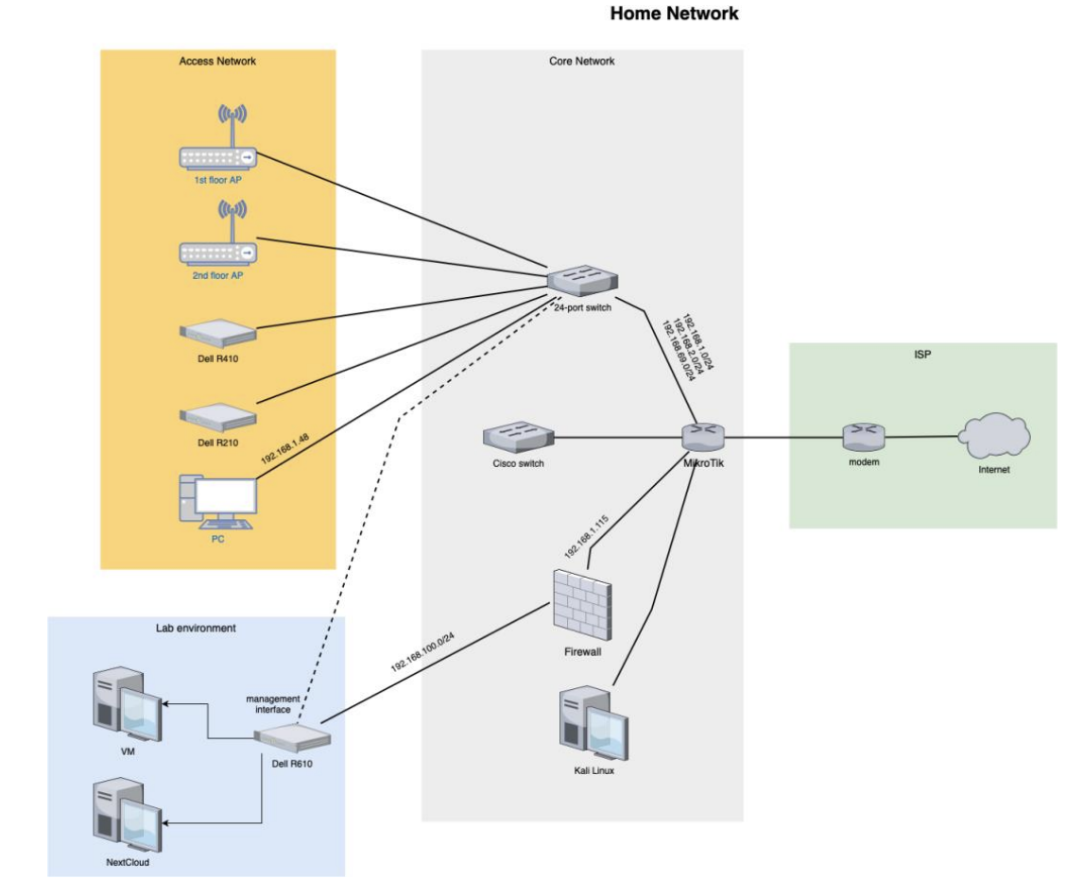
I have decided to add the firewall to VLAN 1 with a static IP address (192.168.1.115) for more convenient access and configuration. This is the firewall’s WAN address. I dedicated a /24 subnet for the test environment, so I am using the 192.168.100.0/24 network in the local network. Hence, the firewall’s LAN address is 192.168.100.1. This configuration made everything comfortable to use and configure while keeping everything out of reach for everybody else. The network structure could be the school example for a double NAT, yet it is not for production use.
I am using a Dell PowerEdge R610 server as a hypervisor (Proxmox) to run virtual machines. One of the server’s interfaces is connected directly to the firewall’s LAN port. However, this is not a realistic situation, in a real-world setup, both would be connected to a shared switch. I added a management interface to the hypervisor to get around the firewall when accessing the web interface for effortless configuration. The VMs are representing PCs or servers hosting basic services. Lastly, I installed Kali Linux on one of my PCs located on VLAN 1 to perform attacks from “outside” my network.
With this part of the setup done, it’s time to jump into the second installment of the series and explore the configurations running on the firewall. See you there!


