%20(18).jpg&w=3840&q=75)
Originally published: April 19, 2022
Updated: September 26, 2023
Please note: LePresidente has recently announced that they will no longer maintain the fork referenced in this article. For an up-to-date alternative, we recommend following the guide by our community member Zoey, available on our blog: Enhancing Web Server Security with NPMplus and CrowdSec.
Nginx Proxy Manager (NPM) is a popular Docker-based and easy-to-use webproxy-in-a-box solution. Supporting CrowdSec for NPM is awesome since it adds another layer of protection to websites you are proxying. Using CrowdSec with Nginx Proxy Manager ensures comprehensive security for your web applications.
But how about native support? That would be cool, right? Luckily someone had that thought already on May 28, 2021, when they created an issue about it on the project’s GitHub repo.
Back then CrowdSec was nowhere as widespread as it is today, so for the first months after that, nothing really happened other than GitHub users adding comments to support the idea of the original creator of the issue.
In October 2021, someone tried experimenting with adding CrowdSec but at that time, there was no suitable log parser — the NPM project changed the logfile format, so they couldn’t be parsed with the normal NGINX log parser.
In January 2022, all that changed as the CrowdSec developer team finally got around to creating one. And when a component came for OpenResty (the web platform based on Nginx, which NPM utilizes), the fun part could really take off!
Forking NPM
This is where the beauty of open source software comes into play.
Luckily an engaged CrowdSec community member took it upon themselves to fork the NPM Docker container to build in the OpenResty Remediation Component and what else is needed. Meet LePresidente, who independently decided to create a fork of NPM. This fork can be used as a drop-in replacement for installations of the original NPM project.
Configuring NPM
We won’t be walking through the process of setting up NPM as many have done before, so, instead, I’ll just link you to the project’s documentation as well as a video (by our friends at IBRACORP) on that subject.
In my setup, I’m using MariaDB for the back end, configured as described in the documentation:
version: "3"
services:
  app:
    image: 'jc21/nginx-proxy-manager:latest'
    restart: unless-stopped
    ports:
      # These ports are in format :
      - '80:80' # Public HTTP Port
      - '443:443' # Public HTTPS Port
      - '81:81' # Admin Web Port
      # Add any other Stream port you want to expose
      # - '21:21' # FTP
    environment:
      DB_MYSQL_HOST: "db"
      DB_MYSQL_PORT: 3306
      DB_MYSQL_USER: "npm"
      DB_MYSQL_PASSWORD: "xxxxx"
      DB_MYSQL_NAME: "npm"
      # Uncomment this if IPv6 is not enabled on your host
      # DISABLE_IPV6: 'true'
    volumes:
      - ./data:/data
      - ./letsencrypt:/etc/letsencrypt
    depends_on:
      - db

db:
  image: 'jc21/mariadb-aria:latest'
  restart: unless-stopped
  environment:
    MYSQL_ROOT_PASSWORD: 'npm'
    MYSQL_DATABASE: 'npm'
    MYSQL_USER: 'npm'
    MYSQL_PASSWORD: 'xxxxx'
  volumes:
    - ./data/mysql:/var/lib/mysql
Preparing CrowdSec Security Engine
By default, the Security Engine listens on localhost only. That won’t work as we want it to be reachable by the NPM container, so the first step is to make this configuration change to listen on all IP addresses.
Need a Crash Course on the Crowdsec Security Engine?
Check out our free Academy course on CrowdSec Fundamentals and learn the ins and outs of the CrowdSec Security Engine.
Edit /etc/crowdsec/config.yaml with your favorite editor and change the line with listen_uri in the server section.
listen_uri: 0.0.0.0:8080
Afterwards, restart the CrowdSec Security Engine:
$ sudo systemctl restart crowdsec
Next, you will need to create an API key for the NPM container.
$ sudo cscli bouncers add npm-proxy
Make sure to keep this API key safe, as you will need it later in the configuration.
Tip: Having the Security Engine listening on all interfaces makes it accessible for all connections. If you have a direct connection to the internet, this may be unwanted. We recommend using the host firewall such as iptables/nftables to restrict access.
NPM Remediation Component
As already mentioned, the LePresidente NPM fork can be used as a drop-in replacement with no need to change the current configuration of NPM.
Drop-in replacement
Edit your docker-compose.yaml. Switching to the new Docker image is literally a matter of changing the image: line in docker-compose.yaml so it points to the new image and replace the existing image line with this:
image: 'Lepresidente/nginxproxymanager:latest'
We’ll do the rest of the configuration shortly. First, you need to deploy the new image to get the config file you need to edit.
Setting up reCAPTCHA
One of the cool features of the Remediation Component, as opposed to the generic firewall remediation, is the ability to mitigate threats without dropping traffic on the network level. In certain cases, you want the user to be able to resolve the remediation (think e-commerce).
You can configure the connections that trigger a group of scenarios to go through a CAPTCHA to prove they’re not a bot. The Component supports multiple providers, however, for this example, I am using reCAPTCHA,
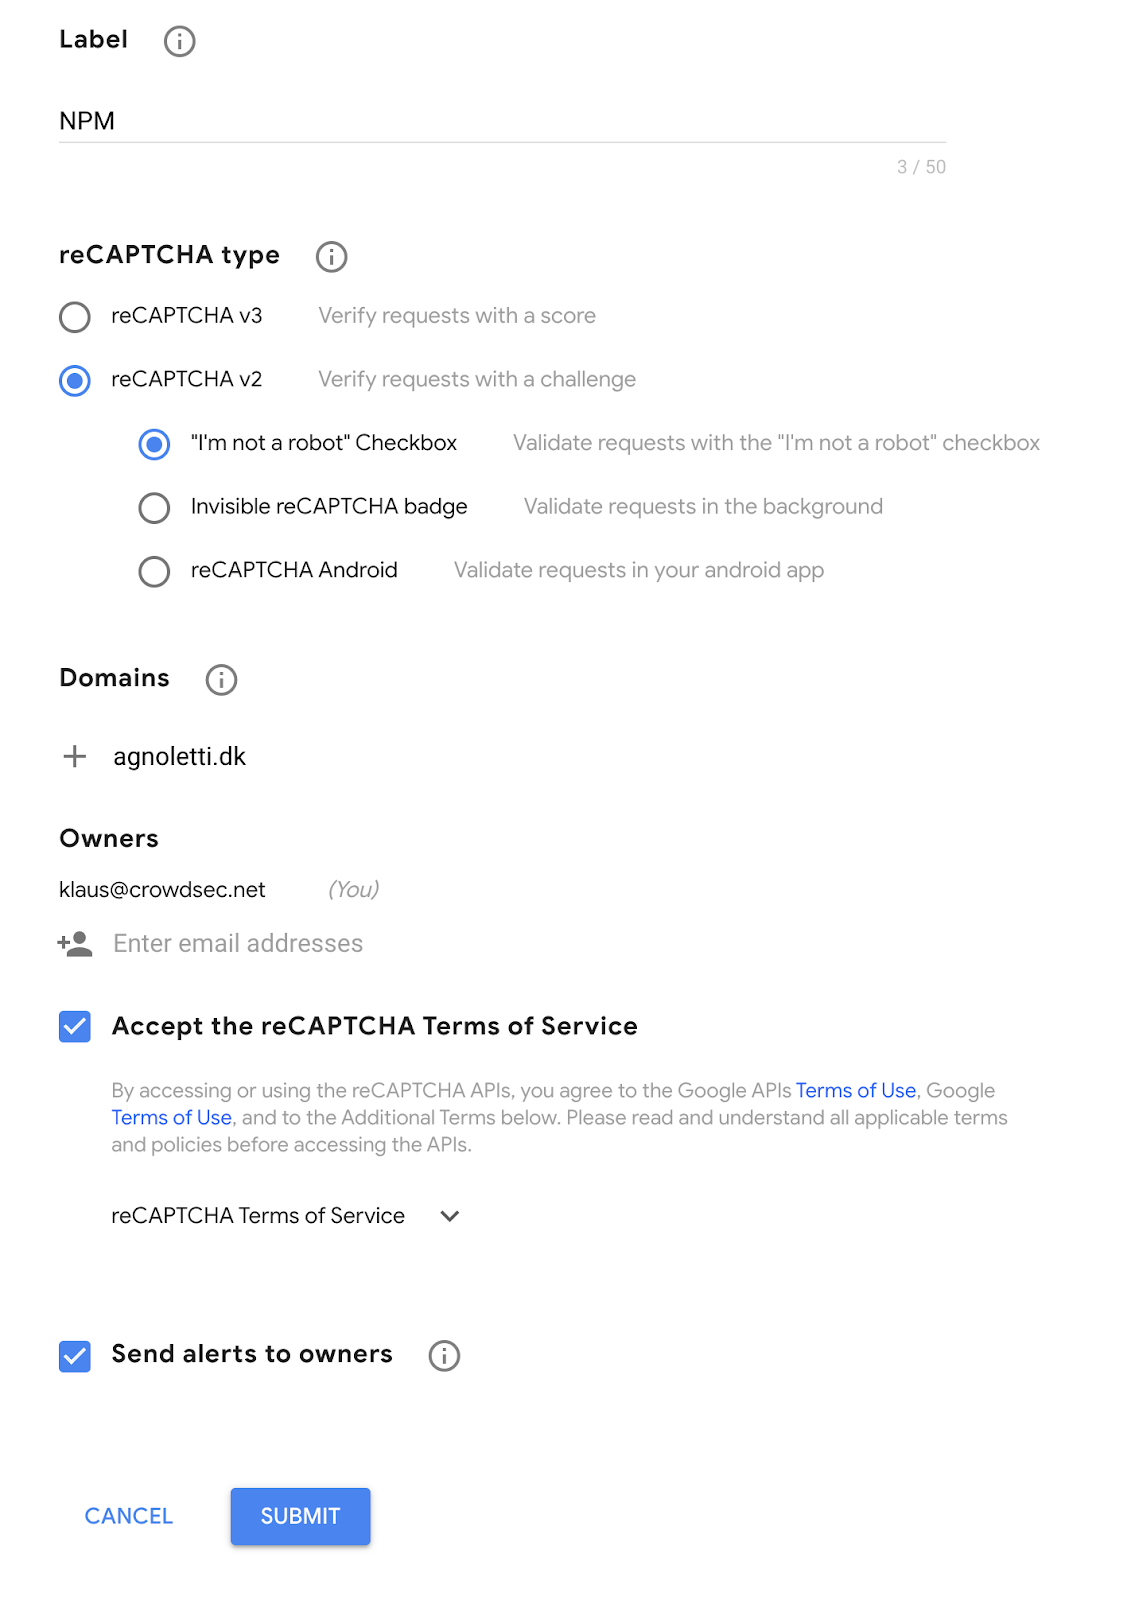
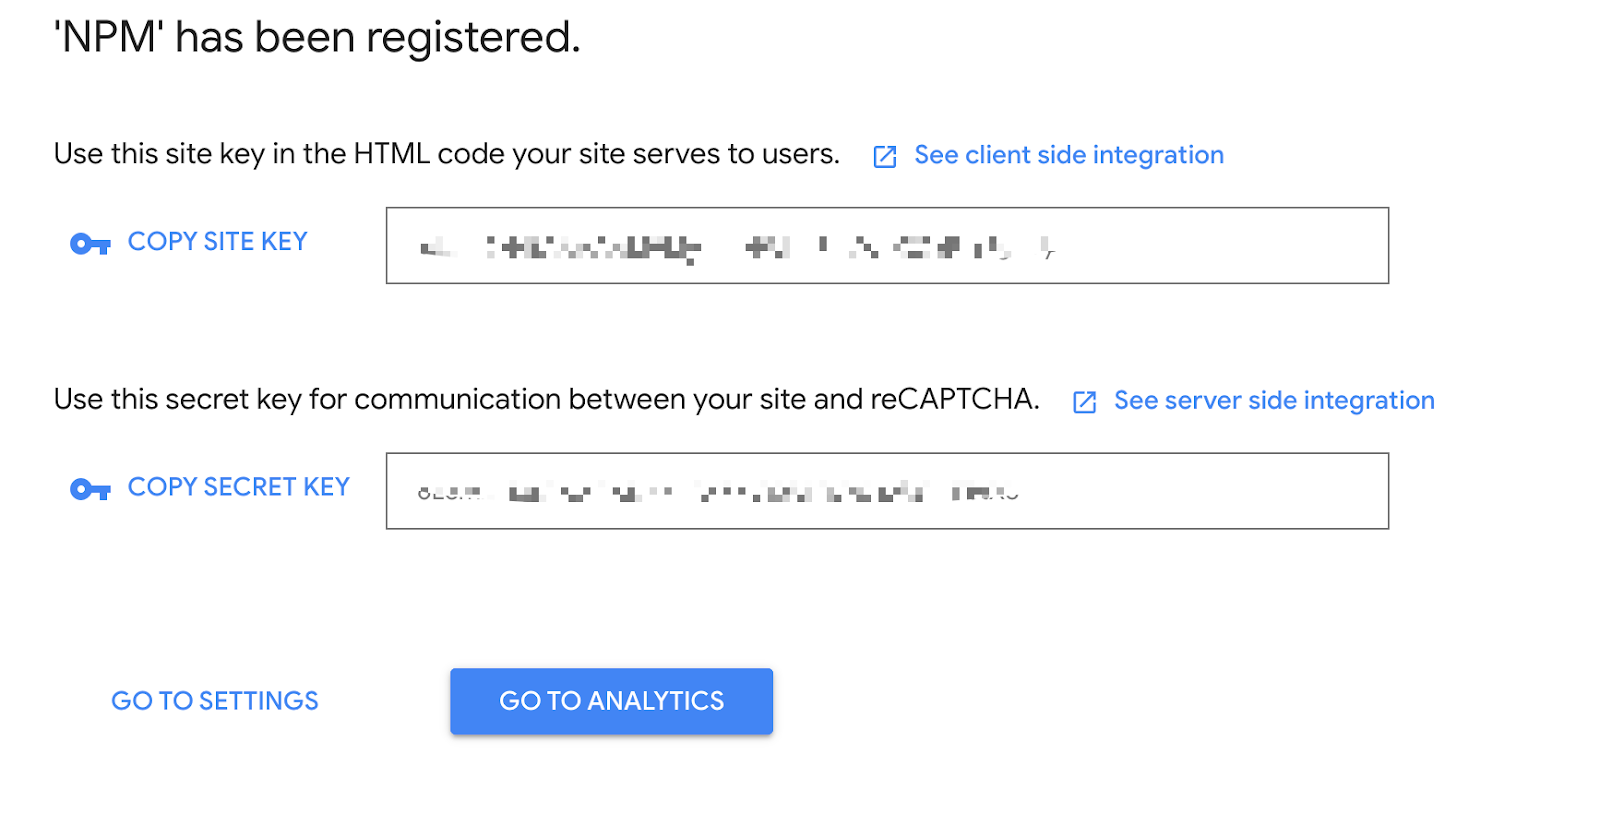
Note: You will need SITE KEY and SECRET KEY later in the configuration, so note them down.
For now, let’s bring up the compose stack to get access to the Remediation Component configuration.
$ docker-compose up -d
You’ll have to wait a few seconds for the new stack to download and deploy (depending on your internet connection). Then edit the data/crowdsec/crowdsec-openresty-bouncer.conf file to contain the following information:
ENABLED=true
##Change this to where CrowdSec is listening
API_URL=http://:8080
API_KEY=
# ReCaptcha Secret Key
SECRET_KEY=
# Recaptcha Site key
SITE_KEY=
Restart the container to deploy your new config file.
$ docker-compose restart
To verify that it works, you need to view logs from the NPM docker container.
$ docker logs --follow
If you see a line like this, then rejoice, you’re all done:
nginx: [alert] [lua] init_by_lua:11: [Crowdsec] Initialisation done
Tuning profiles.yaml
Since CrowdSec already has a Remediation Component that supports CAPTCHA remediations, go ahead and configure the Security Engine to issue these challenges. Typically you will deploy the Firewall remediation component, however, as this blocks all traffic, users can not self-resolve.
You’ll want to control which scenarios trigger CAPTCHA remediations because, for example, you wouldn’t want to issue a CAPTCHA remediation for an SSH brute force attack. This is where profiles.yaml comes into the picture.
This configuration file is part of the Security Engine and, depending on your setup, will be hosted within the configuration folder of CrowdSec. You can then insert the following file above the default profile configuration.
name: captcha_remediation
filters:
- Alert.Remediation == true && Alert.GetScope() == "Ip" && Alert.GetScenario() contains "http"
decisions:
- type: captcha
  duration: 4h
on_success: break
---
This instructs the Security Engine to mitigate scenarios that contain the word HTTP. You can see more configuration examples like this in the documentation.
Before continuing it is important to ensure that the NPM collection is installed.
$ sudo cscli collections install crowdsecurity/nginx-proxy-manager
Next, reload the CrowdSec agent.
$ sudo systemctl reload crowdsec
Congratulations! You now have a CrowdSec-enabled NPM installation with even more security! I hope you enjoyed the ride and are able to make it work without too much fuzz.
Read other tutorials like this one on our blog. And don’t forget to join our Discord server for more support and discussions with the largest of the cyber threat community 💪🏻.


